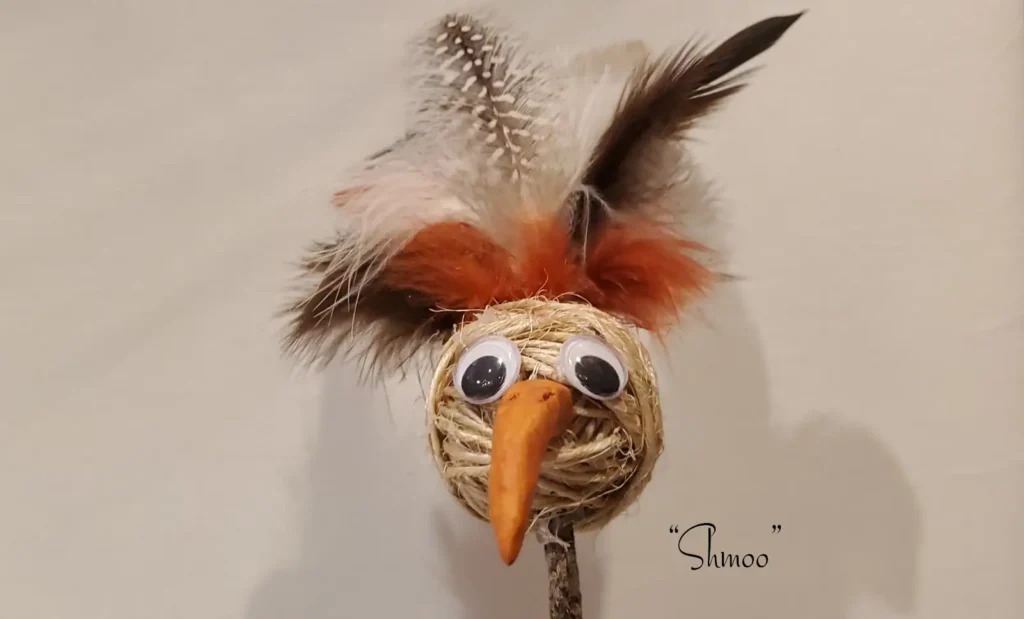
In this article, I’ll show you how my family and I made birds from pinecones, sticks, twine, and feathers. We saw the idea on a reel but there were no instructions. Go figure! After a lot of trial and error, and a lot of laughter, we determined how to do it. (Several of the women in my family are gifted artists and I have learned so much from them!)
I’d like to introduce you to my bird, Shmoo. He has an extra sprinkle of goofy. Ha!
Of course, it is entirely possible that your bird will come out looking completely different than mine. But the fun is in the creative process. Let’s get started!
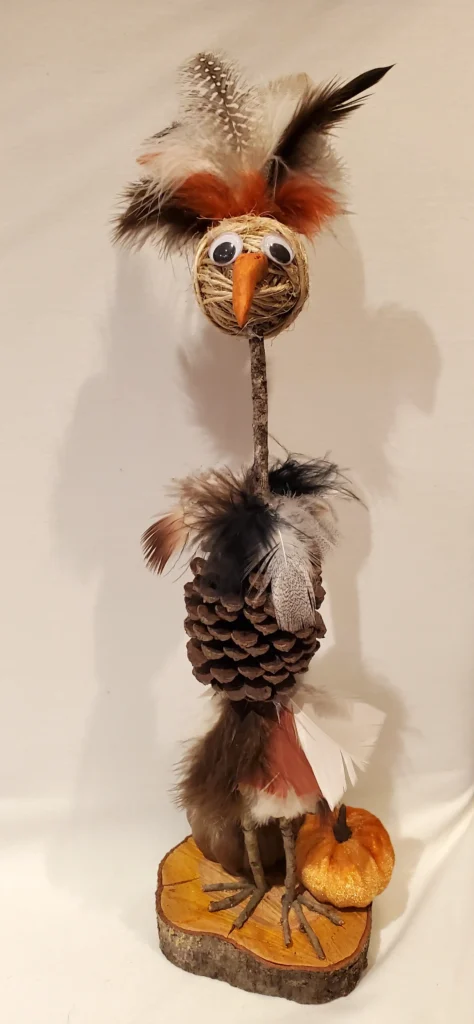
Table of Contents
Cost and Time
Dollar Tree and Amazon should carry most of the products you need. And your backyard or neighborhood is perfect for foraging for sticks and pinecones. So, you could potentially make multiple birds for around $20, depending on how thrifty you are.
Time required: approximately 2-3 hours. It can be assembled in stages if you are short on time.
Materials Needed
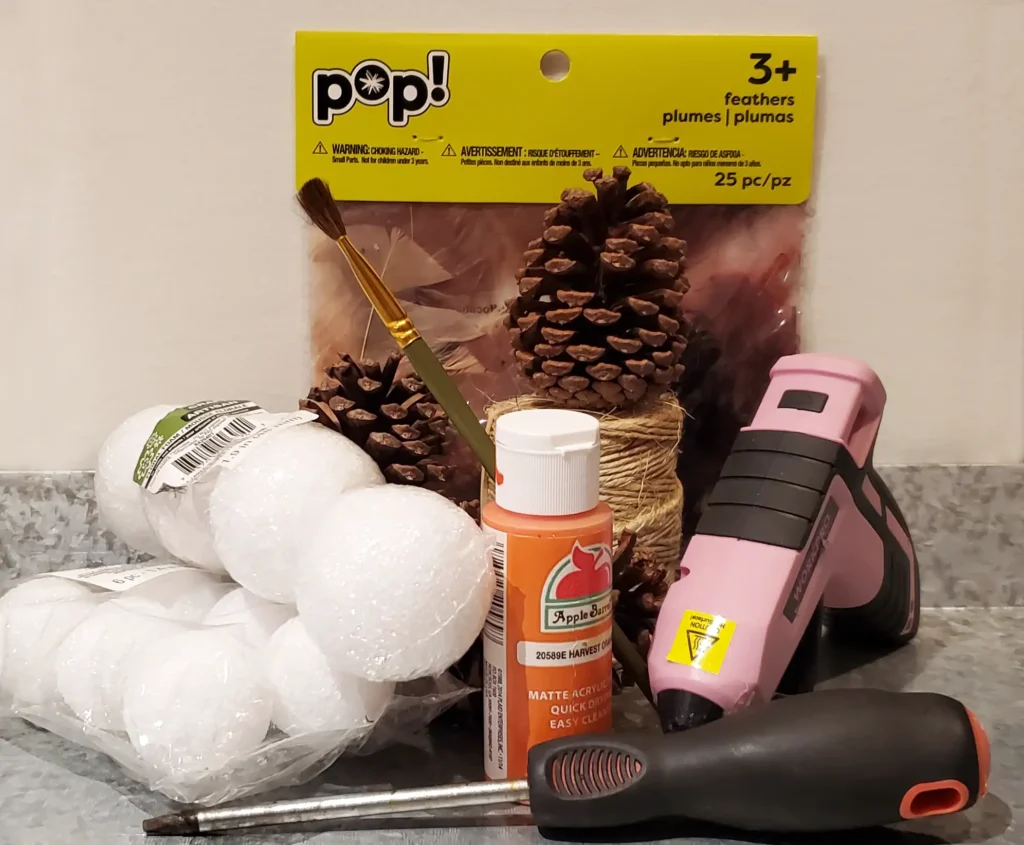
(See “Shop this post” links at bottom)
- A medium-sized pinecone – make sure the bottom is level and flat
- Orange and brown craft paint plus a paintbrush
- Assorted feathers
- 2 – 5″ sticks – make sure they are straight
- 1 – 4” stick
- 1 – 8” stick
- 2 Styrofoam balls – (1) 1.5″, (1) 2″
- Twine or yarn
- 2 Googly eyes
- Clay
- 1 – 1” nail
- A 6″ wood slice for a base
- Clear hot glue
Tools Needed
- Screwdriver
- Pruners
- Hot glue gun
- Powered screw gun for making holes (NOTE: drill bits should be slightly wider than the sticks you choose for the neck and legs.)
How To Assemble Your Bird
STEP 1 – CREATE THE BEAK
Form the beak around the end of the nail head with clay. Most of the pointy end should not be covered so that it can be inserted into the head when completed.
Follow the directions on the clay package. When fully hardened, paint the beak orange.
STEP 2 – LEG ASSEMBLY
In the meantime, cut the 2-in Styrofoam ball in half and paint it brown. ( You can skip this step if you intend on adding feathers to the base because it will be fully covered.)
STEP 3 – PREPARE THE BASE
While the painted items dry, drill two holes approximately 1 – 2 inches apart and about 1/2″ deep in the center of the wood slice. This will anchor the legs to make it stable.
STEP 4 – PREPARE THE PINECONE
Snip the top scales of the pinecone off with the pruning shears. This will create an opening for the neck to be inserted. (Scales are the “leaves” of the pinecone.)
STEP 5 – MAKE THE HEAD
Wrap the smaller styrofoam ball with twine by securing it first with hot glue. Continue to wrap it until it is fully covered, occasionally gluing it to keep it in place. Any pattern you want to create is great as long there are no large gaps.
Next, insert the beak into the center of the head and glue the googly eyes on.
Take your screwdriver and create a hole in the top of the head where you will insert the feathers, and another hole at the bottom to insert the neck. (We will be adding the feathers last.)
STEP 6 – MAKE THE NECK
Insert the 4-in stick into the head and secure with some hot glue.
STEP 7 – ASSEMBLE THE HEAD AND NECK
Next, glue the head/neck onto the top of the pinecone. Be sure to use a lot of glue to anchor it.
STEP 8 – ATTACH THE LEGS
To make the legs, take the two 5-inch sticks and insert them about a half inch apart into the flat side of the half styrofoam ball about a half inch apart, then glue that onto the bottom of the pinecone. Use lots of glue. 🙂
STEP 9 – ANCHOR IT INTO THE BASE
The body of the bird should be assembled, so now insert the legs into the wood slice holes that you drilled, and anchor with more glue.
STEP 10 – ADD THE FEET
Break the smaller sticks into (6) 2-in pieces. Glue sets of three at the base of the legs to create feet.
STEP 11 – EMBELLISH WITH FEATHERS
Lastly, glue feathers into the head, around the neck, and at the bottom of the pinecone.
Congratulations!
You just created a piece of art that you and your family will enjoy for years to come.
Variations
- This bird is scalable. You can make it smaller or larger depending on the length of your sticks, size of the pinecone and the styrofoam balls.
- You can also wrap the neck and legs in twine or yarn to create more interest.
- On the body, instead of feathers, you could also use fringe, taffeta, or moss.
- Instead of plumes of feathers on the head, you could substitute any dried grass or floral element.
- If you cannot obtain a wood slice, any chunk of wood would also work as long as it’s at least 1-2” thick and suitable for drilling.
- Add mini pumpkins, acorns, moss, rocks or other embellishments at the base to add interest.
Send Me Pictures of Your Bird!
If you created this adorable bird, head to my contact page and email me a photo of your creation. I would love to see it and share it in this post!





 Thanks a ton – Your feedback is much appreciated and helps me improve. Have a lovely day!